-
- Week14 Overview
- My Personal assignment
- Summarize the core knowledge points of Embedded Networking and Communications.
- Software
- Embedded network and communication MCU XiaoESP32-S3
- Programming Process
- Some Problems and Solutions
- The Hero Shots
- Team assignment
week14-Embedded Networking and Communications
Week 14 - Overview
Knowledge Points Summary
1. Wired Communication Protocols:
- Asynchronous Serial: UART, USART, RS-232, RS-485
- Synchronous Serial: SPI, I2C, I3C
- USB: TinyUSB, HID, MIDI
- Other Protocols: Ethernet, CAN, LIN, MODBUS, DMX
2. Wireless Communication:
- Radios: Components like oscillators, mixers, filters
- Antennas: Gain, impedance matching
- Single-Chip Solutions: ESP32, ESP8266, RFID, Bluetooth modules, LoRa
3. OSI Layers:
- Application
- Presentation
- Session
- Transport
- Network
- Data Link
- Physical
Individual Assignment:
Design, build, and connect wired or wireless node(s) with network or bus addresses and local input and/or output device(s).
Group Assignment:
Send a message between two projects.
Reference Links
Week14 Embedded Networking and Communications Guide for my Fab Academy Journey.My personal assignment
1.Summarize the core knowledge points of Embeddeded Networking and Communications.
Wired Communication Protocols:
- Asynchronous Serial:
- Protocols: UART, USART, SERCOM, PIO, bit-bang
- Standards: RS-232, RS-422, RS-485
- Applications: Serial broadcast with ATtiny chips, hop-count communication with LEDs
- Synchronous Serial:
- Protocols: SPI (SDI/SDO/CS/SCK), I2C/TWI (SCL/SDA, pull-ups), I3C
- Applications: SD memory cards, libraries for hardware/software interaction
- Asynchronous Unclocked:
- Protocol: ATP
- USB:
- Libraries: TinyUSB, CircuitPython HID/MIDI, Arduino HID/MIDI
- Ethernet:
- Components: Chip, module
- Other Protocols: CAN, LIN, MODBUS, DMX
Wireless Communication:
- Radios:
- Components: Oscillator, mixer, PA, LNA, IF, I/Q, demod, baseband, filters
- Antennas:
- Concepts: Q, antenna gain, impedance matching, short antennas
- Projects: FabFi
- Single-Chip Solutions:
- ESP32: Various modules (C3, WROOM, CAM), Wi-Fi, Bluetooth
- ESP8266: Wi-Fi modules
- RFID: MFRC522
- ISM Band Radios: nRF24L01+, nRF905, RFM95/6/7/8, SX1276
- Bluetooth: RN4871, CC2541, nRF52
- Cellular: SIM800L
- Software Radio:
- Platform: OpenWrt
OSI Layers:
- Layer 1: Physical (PHY)
- Layer 2: Data Link (MAC)
- Layer 3: Network (IP)
- Layer 4: Transport (TCP, UDP)
- Layer 5: Session (RPC)
- Layer 6: Presentation (SSL)
- Layer 7: Application (HTTP)
2.Software
Arduino IDE:
Arduino IDE (Integrated Development Environment) is an open-source software used for writing and uploading code to Arduino-compatible boards.
It provides an easy-to-use environment for both beginners and professionals to develop various electronic and robotic projects.
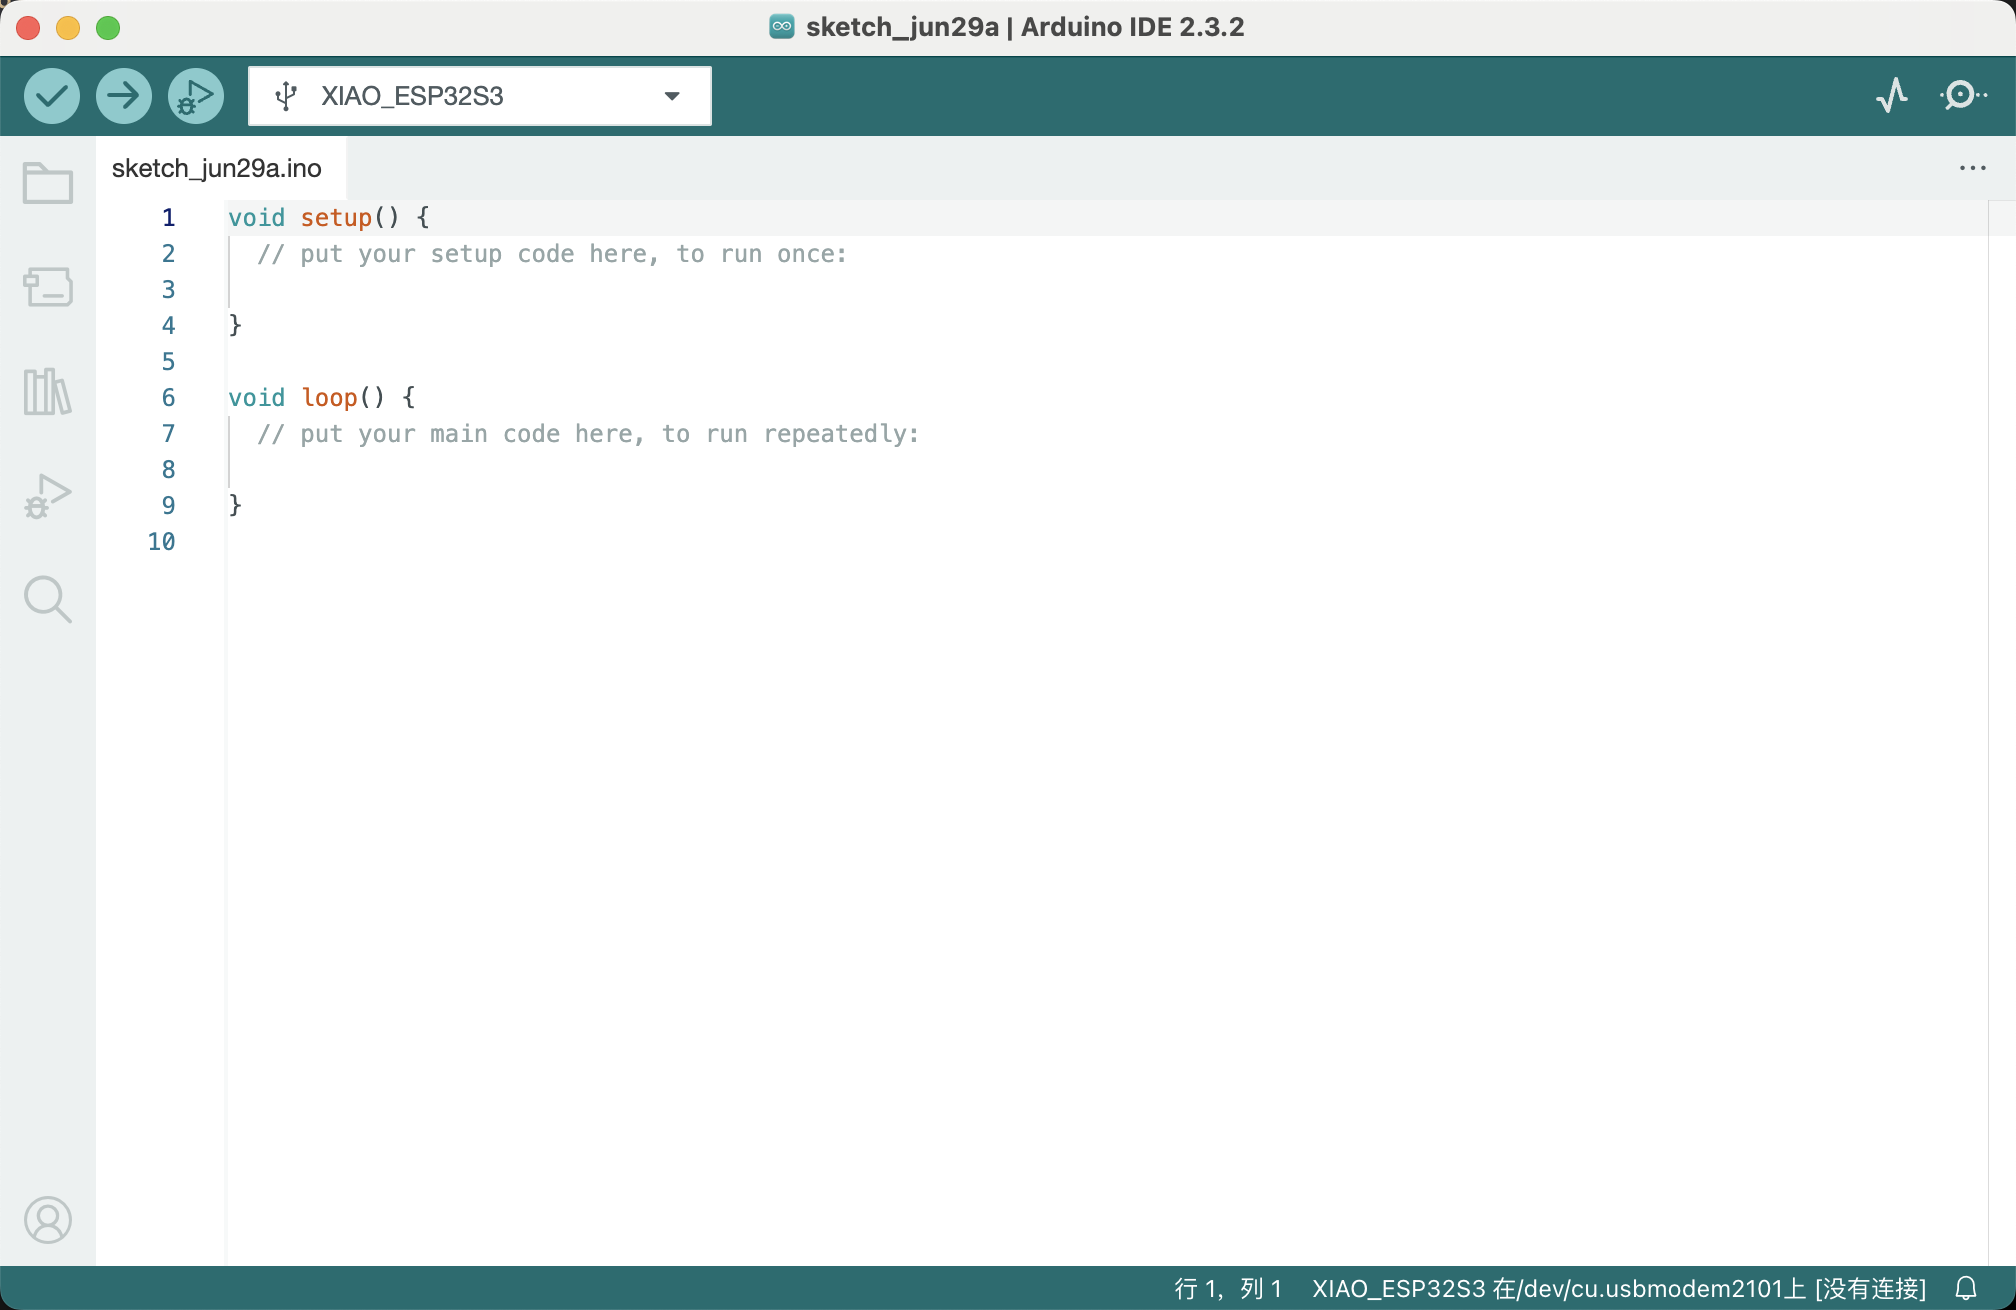
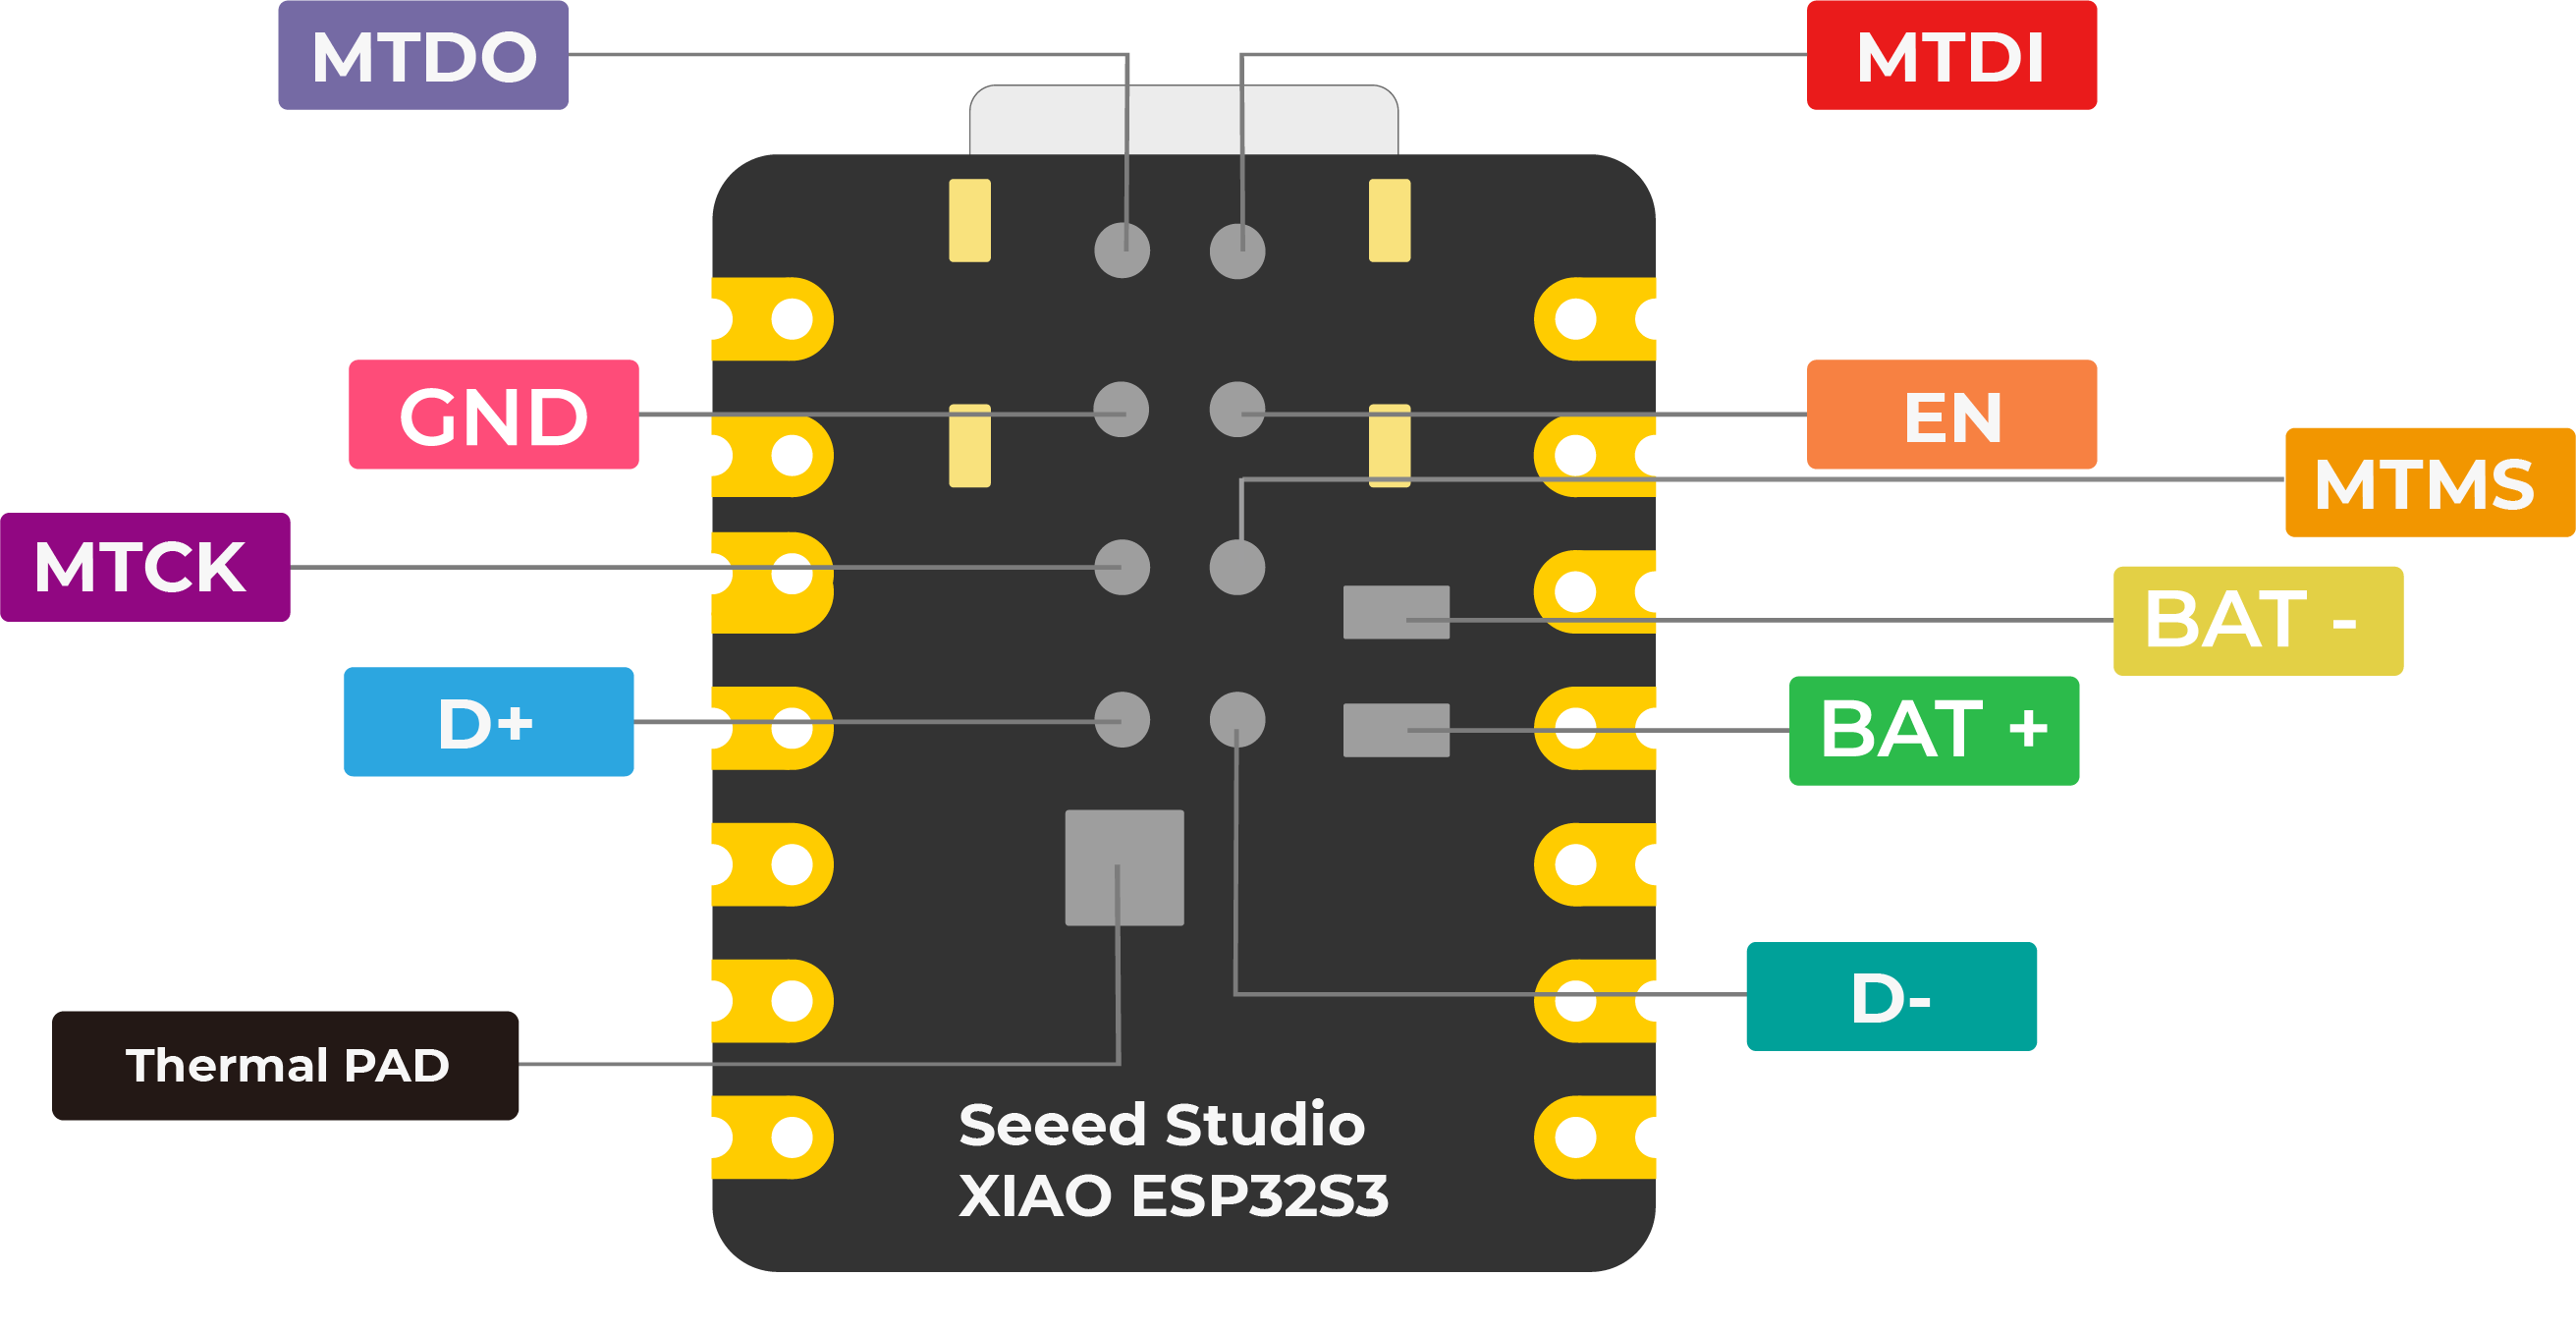
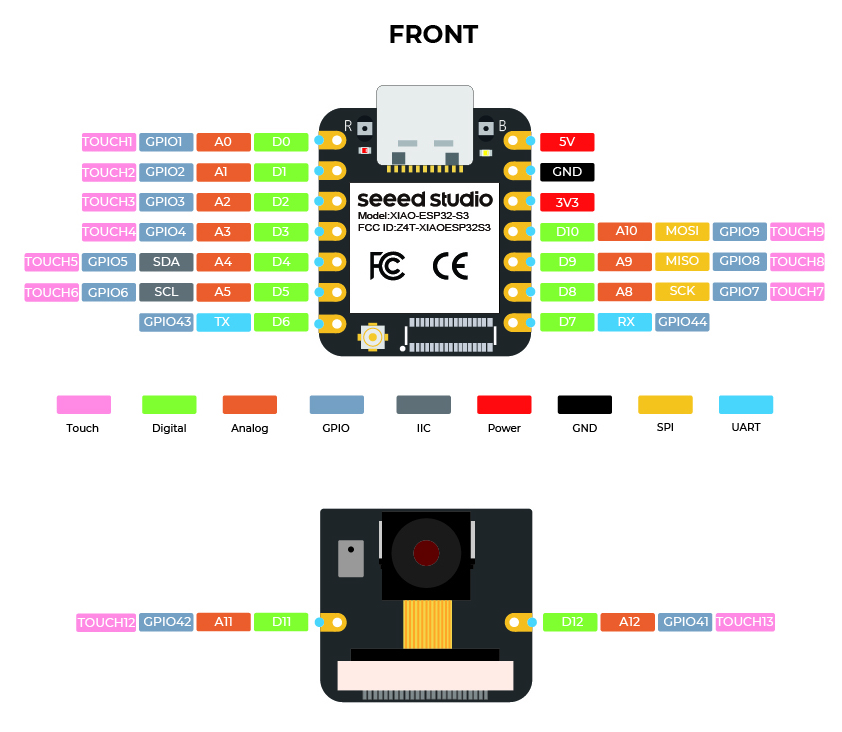
3.Embedded network and communication MCU XiaoESP32-S3
The Xiao ESP32S3 is a development board based on the ESP32-S3 chip, which is a high-performance, low-power microcontroller with integrated Wi-Fi and Bluetooth connectivity.
It has a built-in 8M PSRAM & 8MB Flash, which makes it ideal for embedded applications requiring high performance and low power consumption.
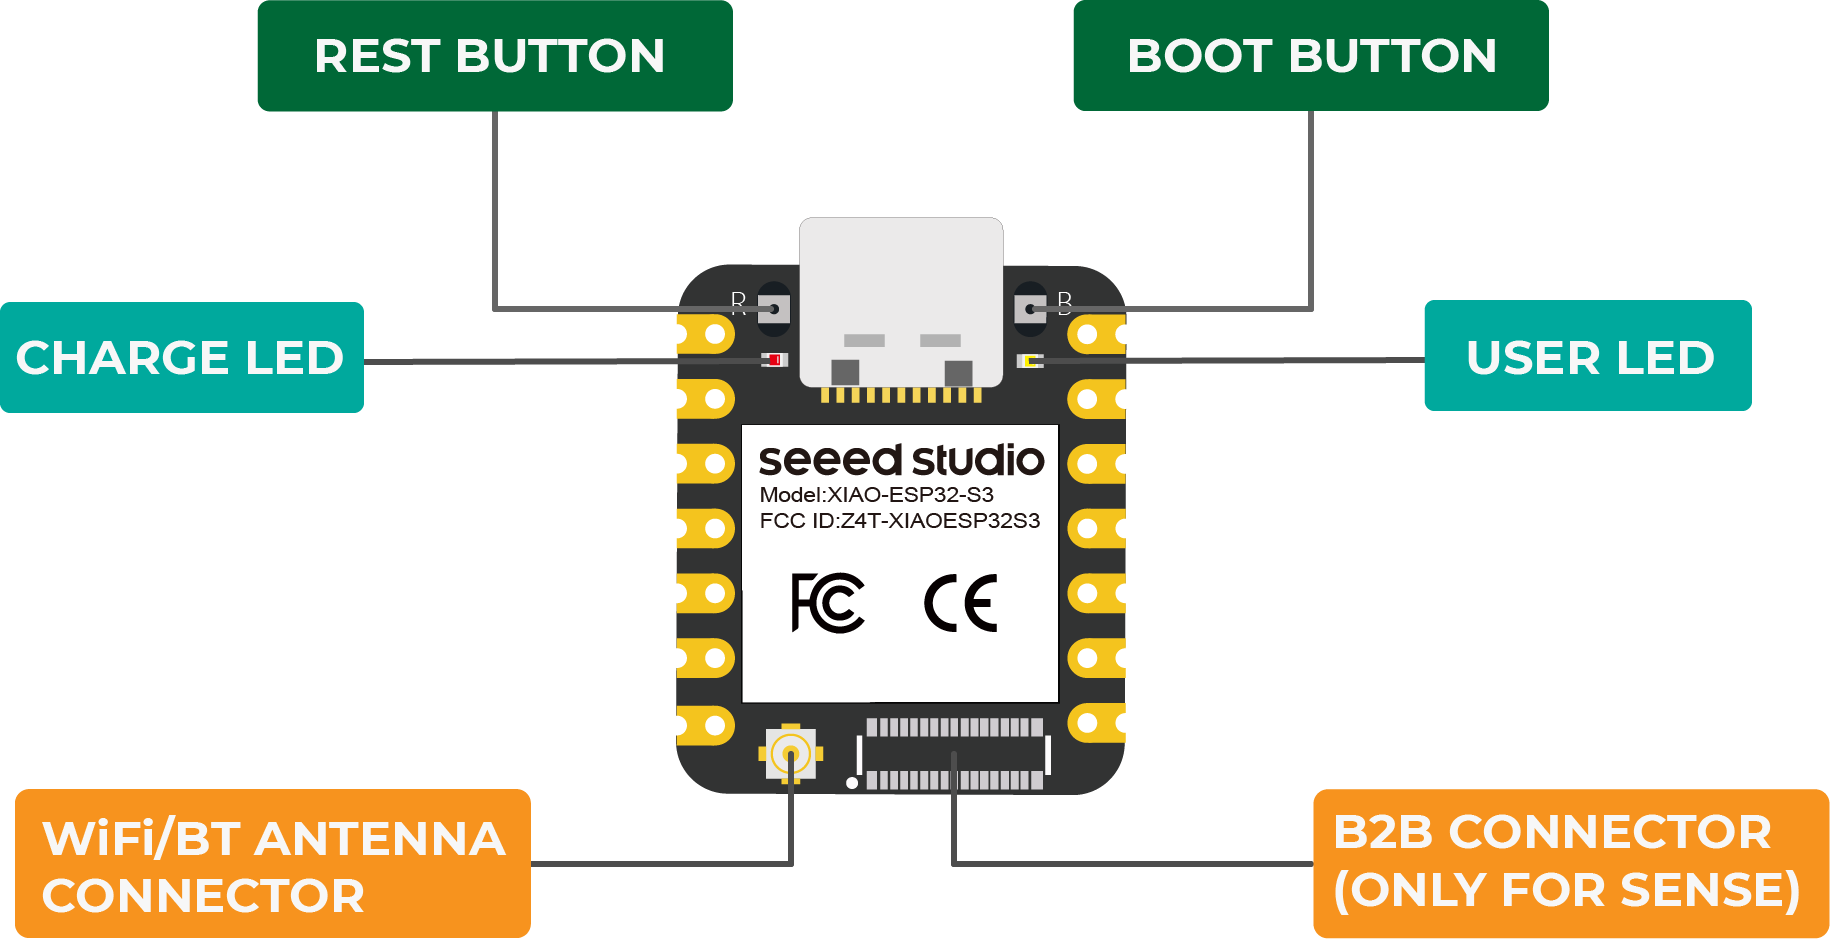
Wi-Fi Antenna
Powerful MCU Board:
Incorporate the ESP32S3 32-bit, dual-core, Xtensa processor chip operating up to 240 MHz, mounted multiple development ports, Arduino / MicroPython supported
Advanced Functionality (for Sense):
Detachable OV2640 camera sensor for 1600*1200 resolution, compatible with OV5640 camera sensor, integrating additional digital microphone
Elaborate Power Design:
Lithium battery charge management capability, offers 4 power consumption models which allow for deep sleep mode with power consumption as low as 14μA
Great Memory for More Possibilities:
Offers 8MB PSRAM and 8MB FLASH, supporting SD card slot for external 32GB FAT memory
Outstanding RF Performance:
Support 2.4GHz Wi-Fi and BLE dual wireless communication, support 100m+ remote communication when connected with U.FL antenna
Thumb-sized Compact Design:
21 x 17.5mm, adopting the classic form factor of XIAO, suitable for space-limited projects like wearable devices
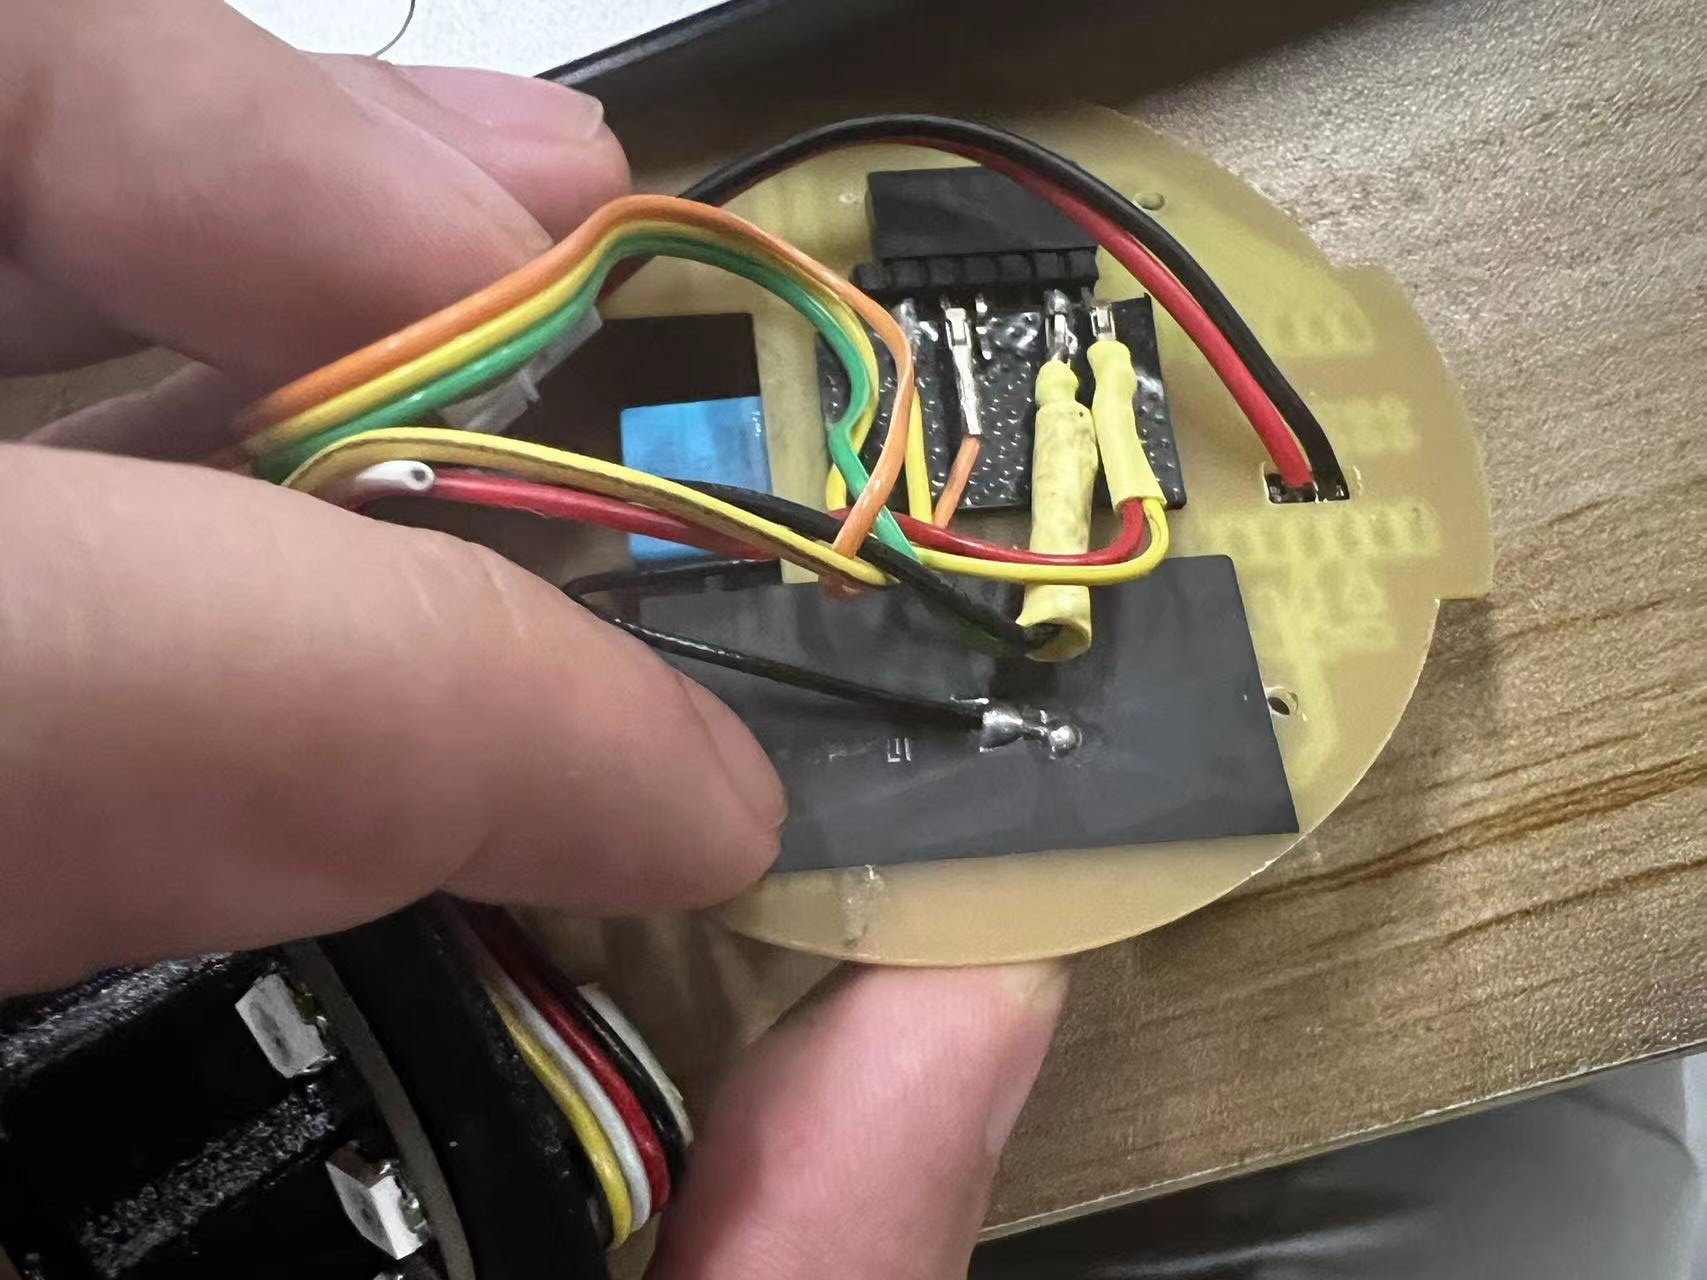
4.Programming Process
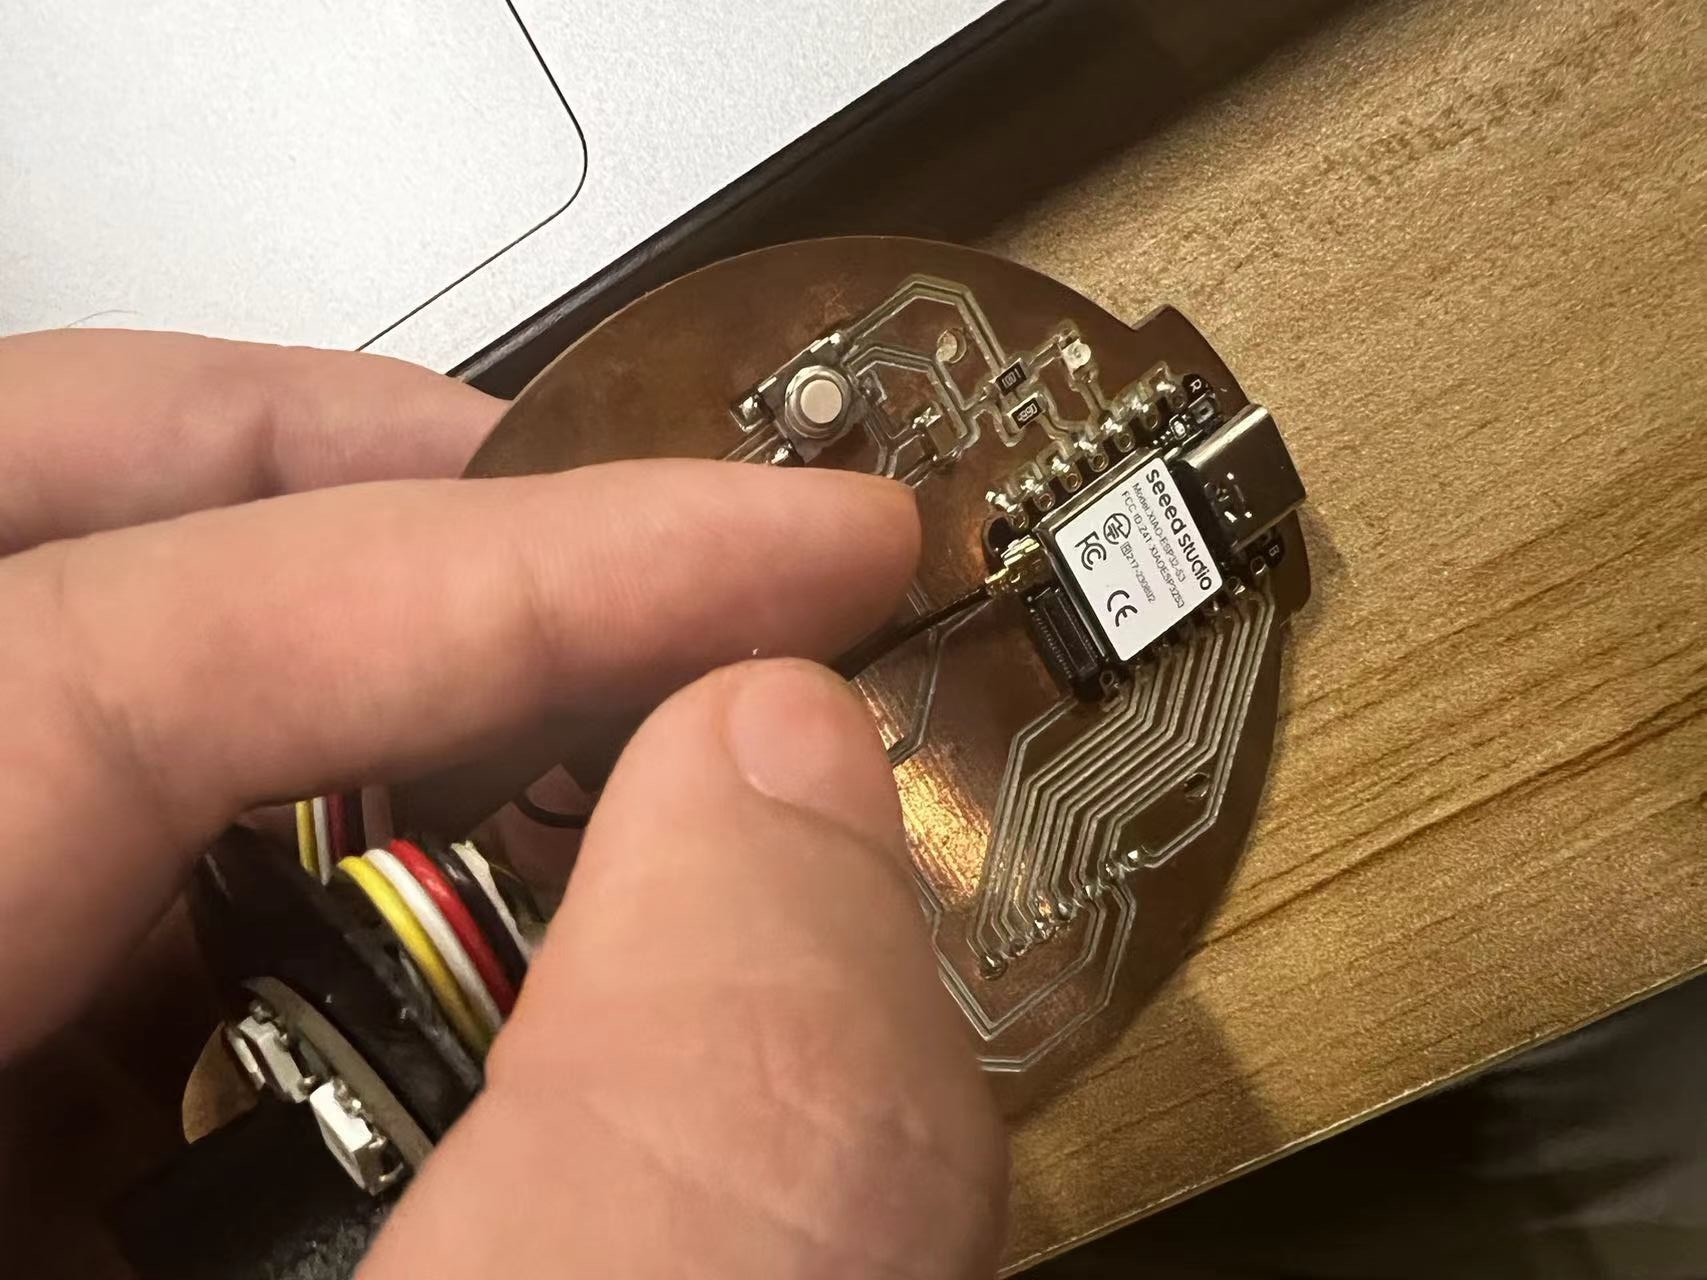
1. Hardware Connection
- Connect the Dao clock Main board to the computer using a USB cable.
2. Software Configuration
- Open the Arduino IDE and select the board and port for the ESP32-S3.
- Select the correct COM port for the board.

3.My program requirements
Set up the Wi-Fi and run the program.
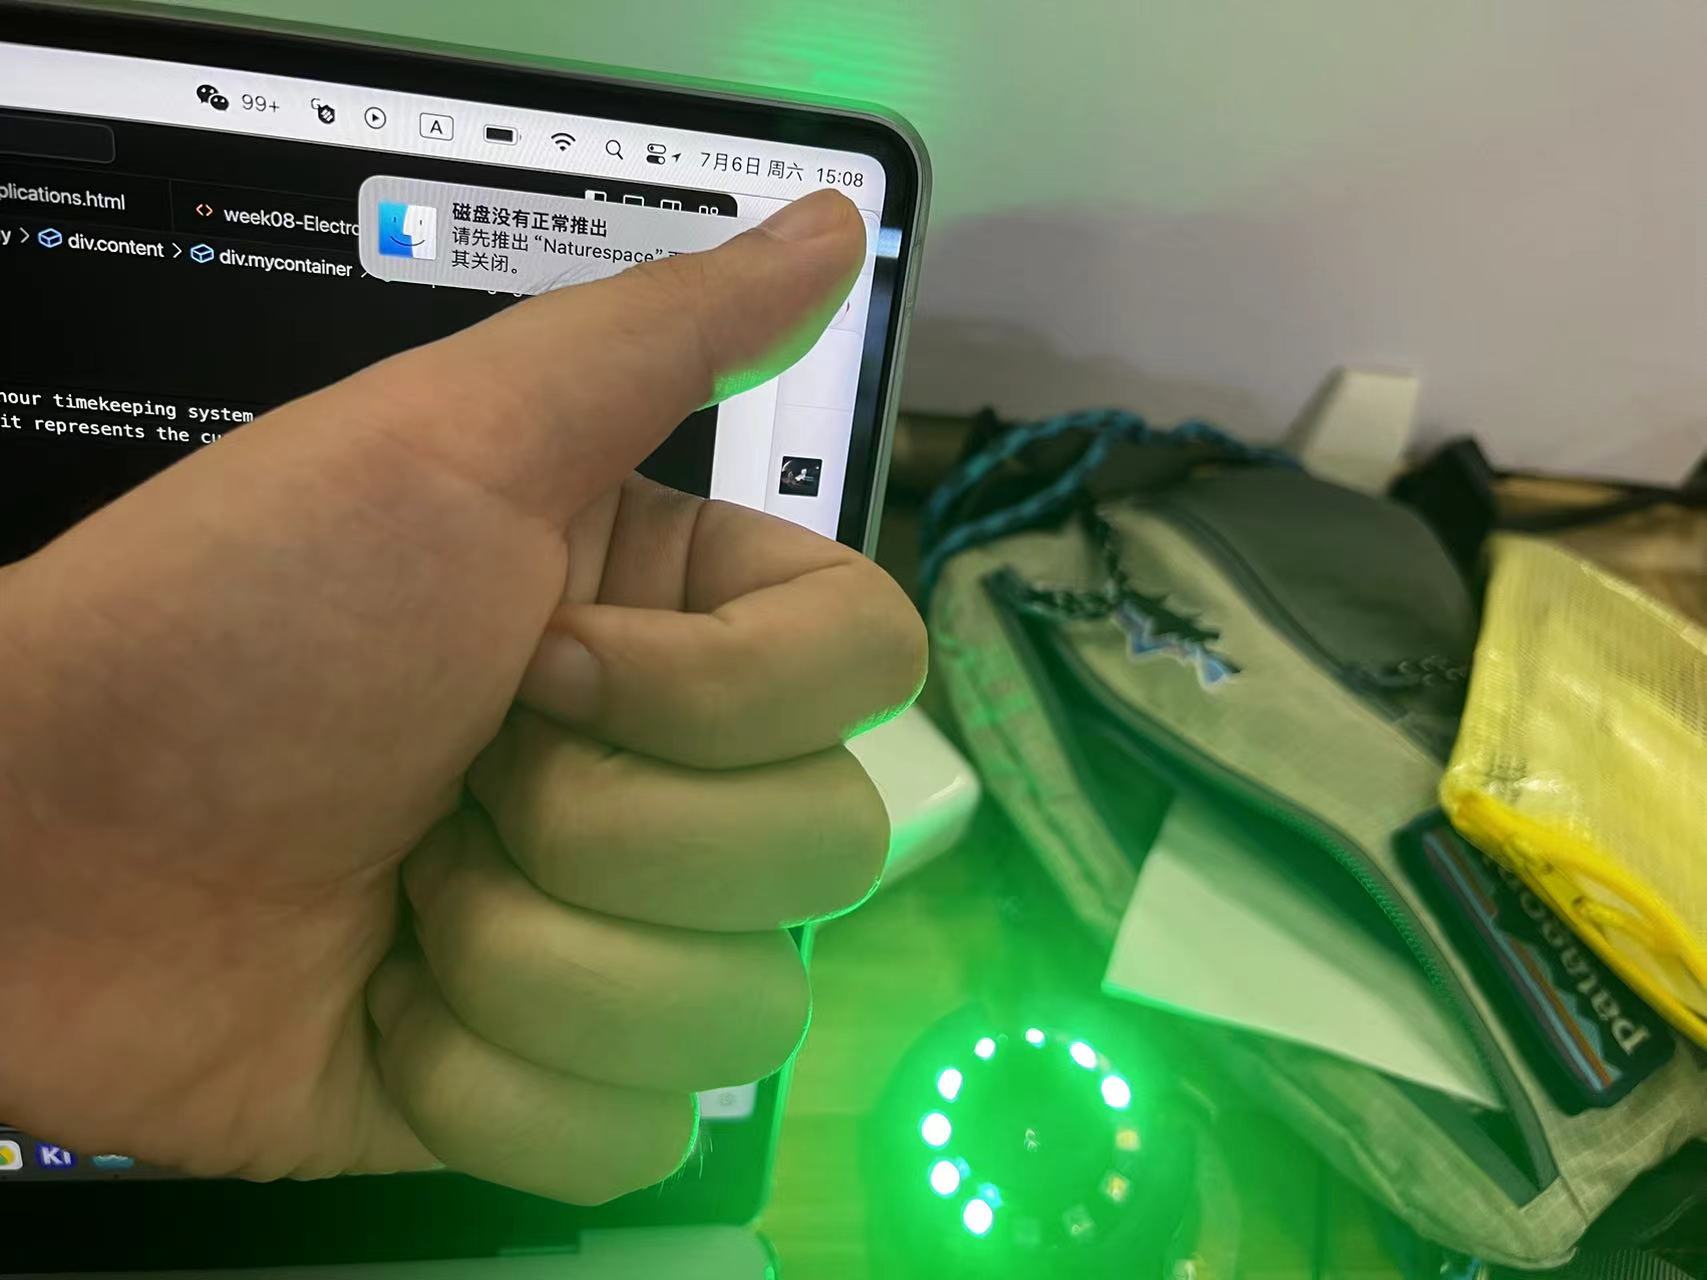
- During the Wi-Fi signal search, the white light rotates.
- After the Wi-Fi connects successfully, all the Neopixels will display green and stay lit for 5 seconds.
- Convert 24 hours into the traditional Chinese 12-hour timekeeping system.
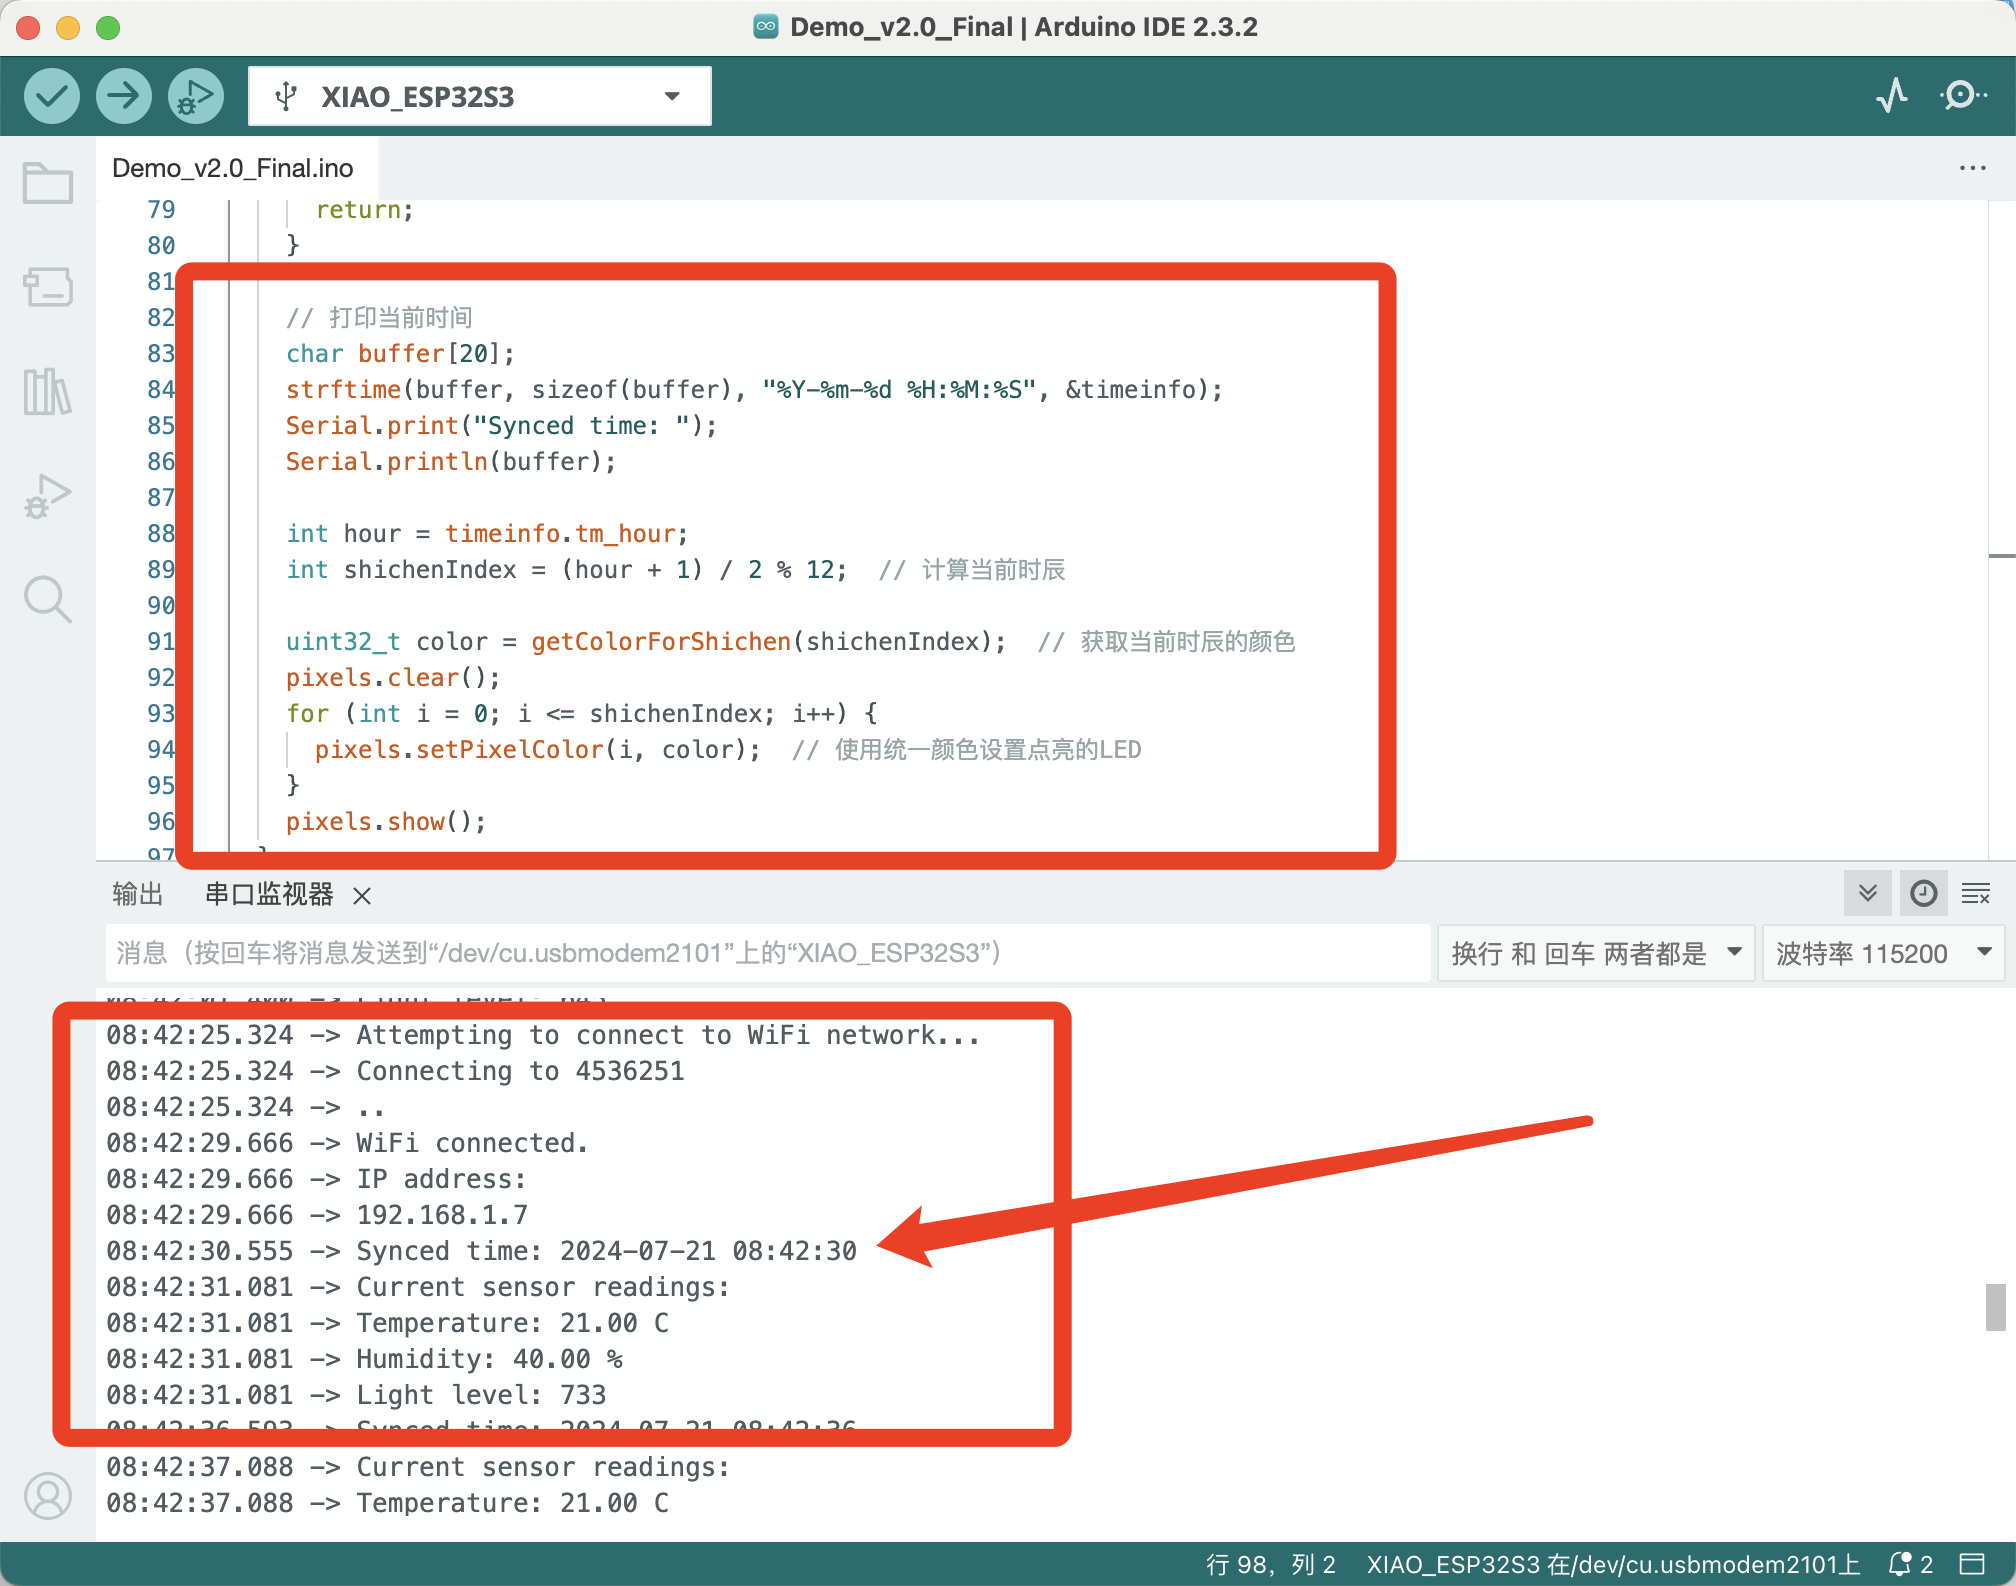
- Retrieve the current time via the internet and print it on the serial monitor.
- Read the current time, and the number of lights lit represents the current hour.
 Here is the code for my program:
                          #include <Adafruit_NeoPixel.h>
                            #include <WiFi.h>
                            #include <DHT.h>
                            #include "time.h"

                            #define PIN_NEOPIXEL D9  // NeoPixel连接的GPIO引脚D9
                            #define NUMPIXELS 12
                            #define DELAYVAL 150
                            #define LIGHT_SENSOR_PIN A8           // 光线传感器连接的模拟输入引脚A8
                            #define DHTPIN D6                      // DHT11传感器连接的GPIO引脚D6
                            #define DHTTYPE DHT11                 // DHT11传感器类型
                            #define WIFI_SSID "4536251"           // Wi-Fi网络名
                            #define WIFI_PASSWORD "EACTJB159357"  // Wi-Fi密码


                            Adafruit_NeoPixel pixels(NUMPIXELS, PIN_NEOPIXEL, NEO_GRB + NEO_KHZ800);
                            DHT dht(DHTPIN, DHTTYPE);

                            void setup() {
                              Serial.begin(115200);
                              pixels.begin();  // 初始化NeoPixel条
                              pinMode(LIGHT_SENSOR_PIN, INPUT); // 设置光线传感器引脚为输入
                              dht.begin();  // 初始化DHT11传感器
                              connectToWiFi(); // 连接到Wi-Fi网络
                              configTime(8 * 3600, 0, "pool.ntp.org", "time.nist.gov"); // 配置时区为北京时间UTC+8
                            }

                            void loop() {
                              int lightLevel = analogRead(LIGHT_SENSOR_PIN); // 读取光线强度
                              int brightness = map(lightLevel, 800, 4095, 0, 255); // 映射光线强度到亮度值
                              pixels.setBrightness(brightness); // 设置LED亮度
                              showHourlyLED(); // 显示常规时辰LED
                              printSensorData(); // 打印传感器数据
                              delay(5000);     // 每10s更新一次
                            }

                            void connectToWiFi() {
                              Serial.println("Attempting to connect to WiFi network...");
                              Serial.print("Connecting to ");
                              Serial.println(WIFI_SSID);
                              WiFi.begin(WIFI_SSID, WIFI_PASSWORD);

                              int ledIndex = 0; // 初始LED索引
                              while (WiFi.status() != WL_CONNECTED) {
                                delay(150);
                                Serial.print(".");
                                lightLEDInSequence(ledIndex);  // 点亮LED形成转圈效果
                                ledIndex = (ledIndex + 1) % NUMPIXELS; // 更新LED索引
                              }

                              // WiFi连接成功后,所有LED长亮5秒
                              pixels.fill(pixels.Color(0, 255, 0)); // 设置所有LED为绿色
                              pixels.show();
                              delay(5000); // 长亮5秒

                              Serial.println("");
                              Serial.println("WiFi connected.");
                              Serial.println("IP address: ");
                              Serial.println(WiFi.localIP());
                            }

                            void lightLEDInSequence(int ledIndex) {
                              pixels.clear();
                              pixels.setPixelColor(ledIndex, pixels.Color(50, 50, 50)); // 设置为柔弱的白光
                              pixels.show();
                            }

                            void showHourlyLED() {
                              float temp = dht.readTemperature();   // 读取温度值(摄氏度)
                              float humidity = dht.readHumidity();  // 读取湿度百分比

                              if (temp > 18 && temp < 37 && humidity > 30 && humidity < 60) {
                                breatheLights();  // 在舒适条件下展示呼吸灯效果
                              } else {
                                time_t now = time(nullptr);
                                struct tm timeinfo;
                                if (!getLocalTime(&timeinfo)) {
                                  Serial.println("Failed to obtain time");
                                  return;
                                }

                                // 打印当前时间
                                char buffer[20];
                                strftime(buffer, sizeof(buffer), "%Y-%m-%d %H:%M:%S", &timeinfo);
                                Serial.print("Synced time: ");
                                Serial.println(buffer);

                                int hour = timeinfo.tm_hour;
                                int shichenIndex = (hour + 1) / 2 % 12;  // 计算当前时辰

                                uint32_t color = getColorForShichen(shichenIndex);  // 获取当前时辰的颜色
                                pixels.clear();
                                for (int i = 0; i <= shichenIndex; i++) {
                                  pixels.setPixelColor(i, color);  // 使用统一颜色设置点亮的LED
                                }
                                pixels.show();
                              }
                            }

                            void breatheLights() {
                                time_t now = time(nullptr);
                                struct tm timeinfo;
                                if (!getLocalTime(&timeinfo)) {
                                    Serial.println("Failed to obtain time");
                                    return;
                                }

                                int hour = timeinfo.tm_hour % 12; // 获取12小时制的小时数
                                uint32_t color = getColorForShichen((hour == 0 ? 12 : hour) - 1); // 获取当前时辰的颜色

                                int maxBrightness = 255; // 最大亮度值
                                int minBrightness = 30;  // 最小亮度值
                                int steps = 30;          // 控制波浪流动的步长

                                // 提取颜色的红、绿、蓝组成部分
                                uint8_t r = (uint8_t)((color >> 16) & 0xFF);
                                uint8_t g = (uint8_t)((color >> 8) & 0xFF);
                                uint8_t b = (uint8_t)(color & 0xFF);

                                // 增加亮度的循环
                                for (int brightness = minBrightness; brightness <= maxBrightness; brightness += 5) {
                                    for (int i = 0; i <= hour; i++) {
                                        pixels.setPixelColor(i, pixels.Color(r * brightness / maxBrightness, g * brightness / maxBrightness, b * brightness / maxBrightness));
                                    }
                                    pixels.show();
                                    delay(30); // 控制波浪速度
                                }

                                // 减少亮度的循环
                                for (int brightness = maxBrightness; brightness >= minBrightness; brightness -= 5) {
                                    for (int i = 0; i <= hour; i++) {
                                        pixels.setPixelColor(i, pixels.Color(r * brightness / maxBrightness, g * brightness / maxBrightness, b * brightness / maxBrightness));
                                    }
                                    pixels.show();
                                    delay(30); // 控制波浪速度
                                }
                            }

                            uint32_t getCurrentHourColor() {
                              time_t now = time(nullptr);
                              struct tm timeinfo;
                              if (!getLocalTime(&timeinfo)) {
                                Serial.println("Failed to obtain time");
                                return pixels.Color(255, 255, 255); // 默认白色
                              }

                              int hour = timeinfo.tm_hour % 12; // 获取12小时制的小时数
                              return getColorForShichen((hour == 0 ? 12 : hour) - 1); // 获取当前时辰的颜色
                            }

                            void printSensorData() {
                              float temp = dht.readTemperature();   // 读取温度值(摄氏度)
                              float humidity = dht.readHumidity();  // 读取湿度百分比
                              int lightLevel = analogRead(LIGHT_SENSOR_PIN); // 读取光线强度

                              Serial.println("Current sensor readings:");
                              Serial.printf("Temperature: %.2f C\n", temp);
                              Serial.printf("Humidity: %.2f %%\n", humidity);
                              Serial.printf("Light level: %d\n", lightLevel);
                            }

                            uint32_t getColorForShichen(int index) {
                                switch (index) {
                                    case 0: return pixels.Color(0, 0, 0);     // 子时 - 玄黑
                                    case 1: return pixels.Color(74, 66, 102);     // 丑时 - 黛色
                                    case 2: return pixels.Color(61, 59, 79);     // 寅时 - 鸦青
                                    case 3: return pixels.Color(237, 87, 54);   // 卯时 - 妃色
                                    case 4: return pixels.Color(255, 241, 67);   // 辰时 - 藤黄
                                    case 5: return pixels.Color(249, 144, 111);   // 巳时 - 酡颜
                                    case 6: return pixels.Color(157, 41, 51);   // 午时 - 胭脂
                                    case 7: return pixels.Color(72, 192, 163);   // 未时 - 天水碧
                                    case 8: return pixels.Color(217, 182, 17); // 申时 - 秋香
                                    case 9: return pixels.Color(115, 151, 171); // 酉时 - 花青
                                    case 10: return pixels.Color(93, 81, 60);    // 戌时 - 相思灰
                                    case 11: return pixels.Color(214, 236, 240);    // 亥时 - 月白
                                    default: return pixels.Color(255, 255, 255); // 默认 - 白色
                                }
                            }
5.Some Problems and Solutions.
During the Wi-Fi connection process, I used the Wi-Fi hotspot from my iPhone, but I couldn't connect successfully.
After repeatedly checking the code and finding no issues, I decided to switch to a different Wi-Fi network, which then connected successfully.
6.The Hero Shots
Team Assignment
Let's Jump to the Top !!!